I want to wish everyone a very Merry Christmas today! I am leaving you with a few creations I did not have a chance to blog before today.


I hope this holiday season brings joy and peace to all who are celebrating!


 So I stamped the flowers and leaves on Prism cardstock. The large flower was stamped three times and each section cut out and popped up on each other. I colored with Prisma pencils and oms where each layer meets, just making it a bit deeper. Then I used my Quickie glue pen to add ultra fine glitter all around it. The base paper is Vintage Cream also from PaperTrey and I stamped it with a linen bg stamp, with a Versa Magic Dew Drop in Wheat, that I bought unmounted at a stamp show a few years ago but I can't remember who makes it... I finished it off with a piece of PaperTrey ribbon and a button from my stash with their awesome twine threaded through it! This picture does not do it justice by any means...it's really stunning irl (if I do say so myself!).
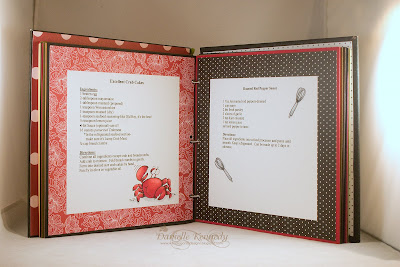
 I had completed all of the inside pages first and went whimsical. But when it came to doing the cover I was just at a loss. I had lots of small images but nothing that I felt was appropriate for the front. I ended up making it coordinate with the card instead.
 All paper used inside the book, with exception to the white cardstock the recipe is printed on, is from Paper Trey.
 The cover paper is Bo Bunny black swiss dots. And the interior is an Imaginesce ( red with large pink dots) and Doodlebugs (black on white dots).
 The images are from all different sources. Many of them are from Whipper Snapper sets created by Anna Wight, such as Chicken's in the Kitchen and What's Cookin'.
 Several of these recipes are from Cathy, affectionately known as the Noble Pig. If you like to cook, and have a good sense of humor, you must head over there now! She creates or adapts recipes, and if they pass her test she passes them on to us...step by step with great photos! Her blog is a wealth of culinary information and lots of other stuff too!
 This clam is from Outlines. Isn't he cute? Too bad he's gonna be dinner! I got this recipe from my mom and she doesn't remember where it originated from. There are lots out there that are similar but not the same as this one...and it's always a big hit!
 You don't know what you're missing until you make this recipe from Pioneer Woman!


I hope everyone has a wonderful Wednesday...hey, we're halfway there!!!
Stamps: Outlines
Paper: PTI and Bazzill solid cardstock
Ink: Memento Tuxedo Black
Accessories: Prisma/OMS, gems, Sakura Stardust pen, Gelly Roll pen/black, Prima flower, Copper Stickles, lots of foam dots!!